Our DIY IKEA Kitchen Remodel
Thinking about tackling a DIY IKEA kitchen? Read through and see what we think of the IKEA kitchen and countertop.
We purchased our home in October of 2011, and while it had good bones, the interior was dated. Our first renovation was in June 2014, where we completed all new flooring in the entire house. This was a huge improvement from the old carpet and dated tile. We waited a few years to save some money and made a plan the beginning of 2017 to complete more renovations.
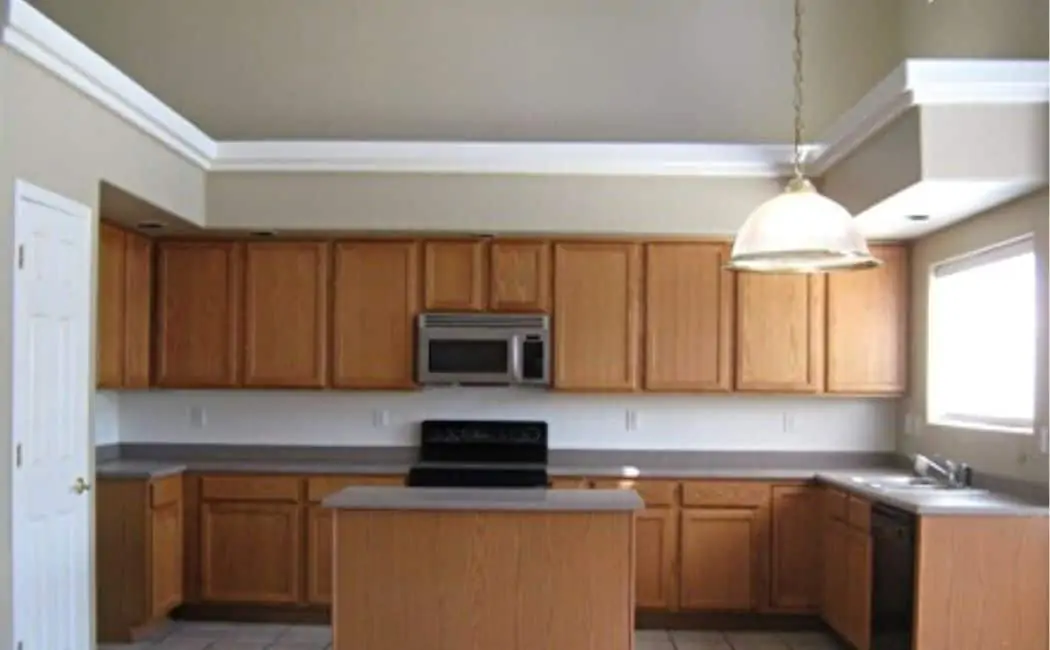
Our priority list included, having the house painted on the exterior and interior, new window shutters, replacing all of our gold hardware, new lighting fixtures, and the most expensive one- renovating our kitchen.
We knew kitchen renovations were expensive and we had an idea of our ‘dream kitchen’, but we wanted to make the most of the money we had to spend. After pricing out some options, we chose to go with an IKEA kitchen, and drumroll….Do it ourselves!
Best Time to Purchase The IKEA Kitchen
I highly recommend waiting for the IKEA Kitchen sales event. We were able to save 20% on the entire kitchen cabinet purchase and the quartz countertop.
Start by scheduling a quote with IKEA. This is where they come to your house, take measurements and mock up the design for you. The design includes the exacts parts you will need to fit your kitchen configuration.
The cost at the time was $199, but you get that credited if you purchase the kitchen. At this point they will also give you a quote for installation. Keep in mind the install does not include any demo. It must be a clean slate.
After reviewing the cost and some negative reviews for IKEA installation, we decided to do it ourselves to save more money and splurge on high-end appliances.
Timeline and Install
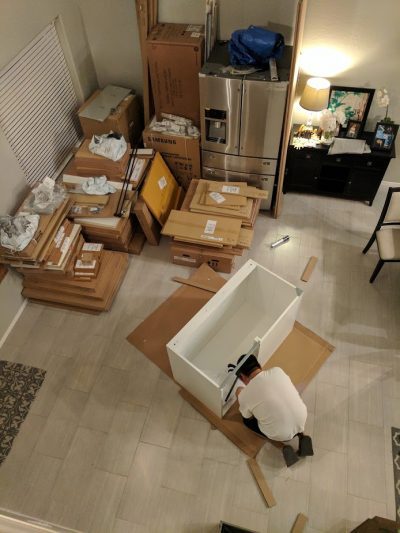
Once we placed the order at the IKEA store, It took about 3 weeks for the kitchen parts to arrive and that’s when reality set in. Hundreds of pieces and boxes arrived on our driveway in 2 large rectangular pallets. I think Danny and I both had mini heart attacks after this!
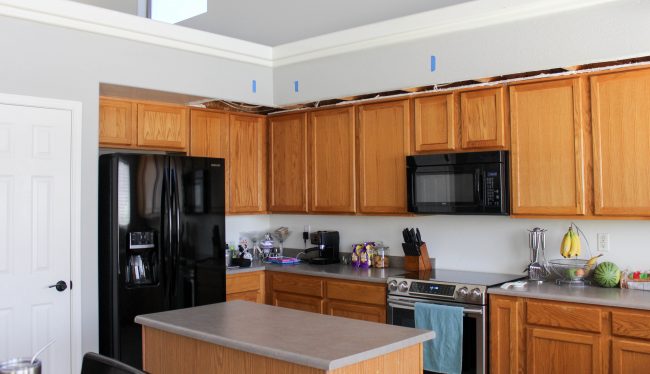
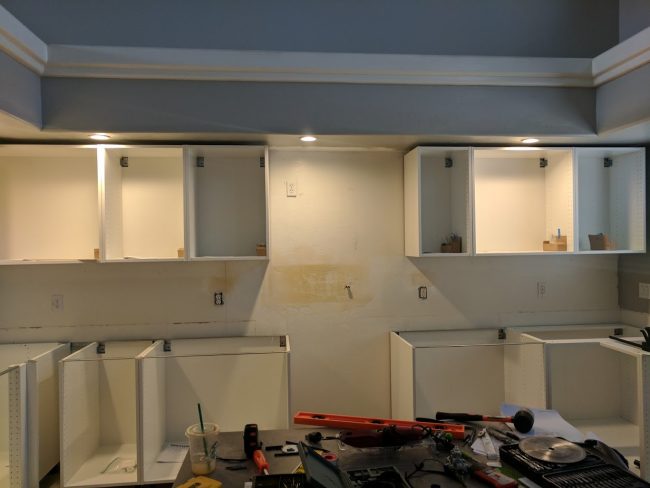
We started by removing our recessed lighting and relocating them, since the new cabinets are longer in length. The drywall needed to be repaired and after 2 failed attempts, Danny hired a drywall expert to come repair it.
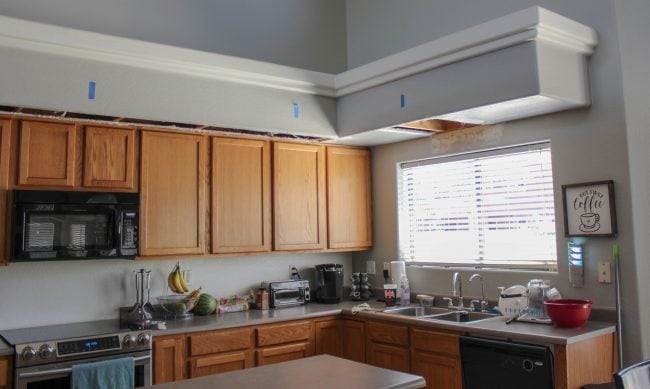
Then we started removing the top cabinets and completing new plumbing for a pot filler over the stove. This wasn’t in the initial plan, but a splurge we were able to squeeze in.
The instructions for the IKEA kitchen is modular and actually made it fairly easy to install. Basically you put together each cabinet and a master blueprint shows where each piece goes.
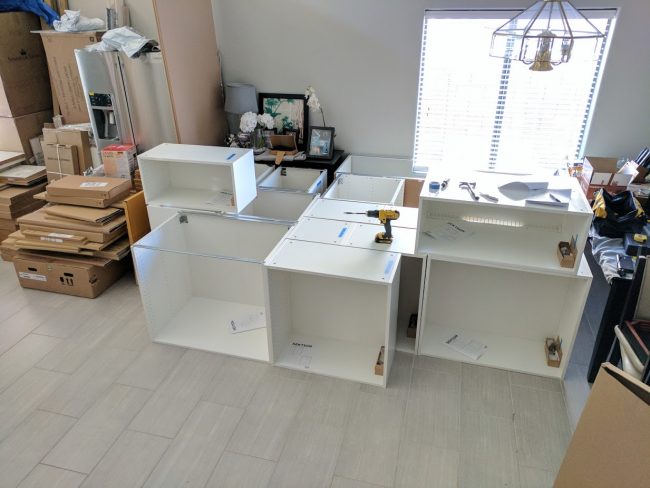
The assembly of the cabinets themselves were not difficult, pretty much your basic IKEA furniture assembly.
However, the installation of the railing, where the cabinets hang, was a little challenging. But once the railing was secured and strait, it was just a matter of hanging up the cabinets on the railing.
Another challenging part was cutting the pieces of wood for the outside of the cabinets. This took some saw skills, and Danny ended up buying 3 different saws to complete all the different wood cuts needed. I’m sure you can hire this part out, if you don’t want to invest in a table saw.
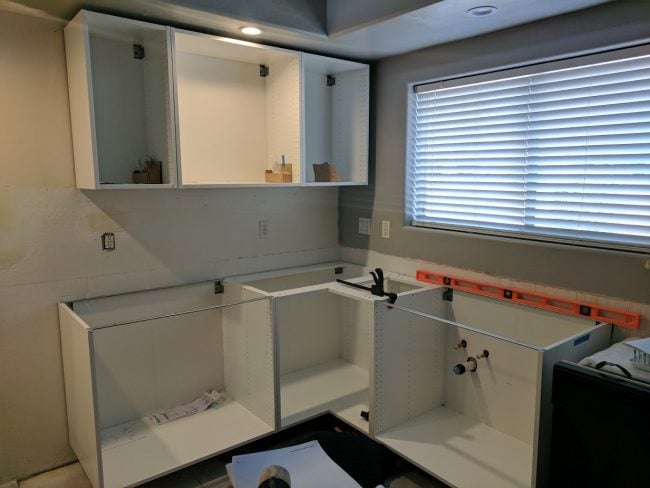
Once the bottom cabinets were all installed, we were able to have the countertops measured. It took 2 weeks for the countertops to be fabricated, and once they came to install them, 2 of the pieces were the wrong size.
Thank goodness it was just an issue of the wrong pieces getting picked up and the right ones were at the factory. They were able to finish the install that day, and we loved the way they looked! We also had the island extended 1 foot to have room for seating.
We were finally seeing the light at the end of the tunnel, and lots of blood, sweat, and tears, in the process! About 90% of the kitchen was completed and the next step was to order all new shutters for the windows. These took 8 weeks to deliver and caused a delay in our kitchen completion. Since the shutters had a border around the window, we needed to wait till they were installed before completing the backsplash.
IKEA Kitchen Reveal!
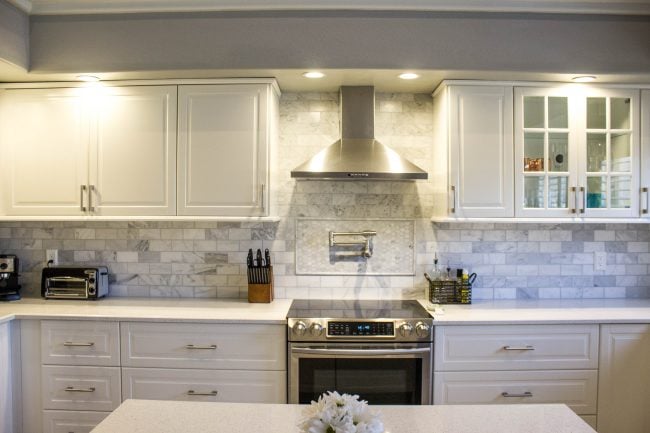
Initially we were going to do a white glass subway tile, but once the cabinets and countertop were installed, I felt the white would be too plain. Then we saw a carrera marble subway tile, and instantly fell in love. Each piece was different and had various shades of white and grey, which was perfect for adding color and texture to the kitchen.
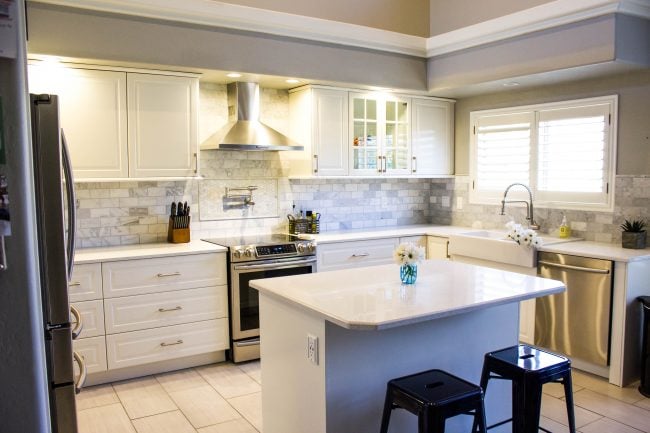
I can honestly say we made our ‘Dream Kitchen’ a Reality!
I absolutely love the way it turned out, and the fact that my husband built it makes it that much more special.
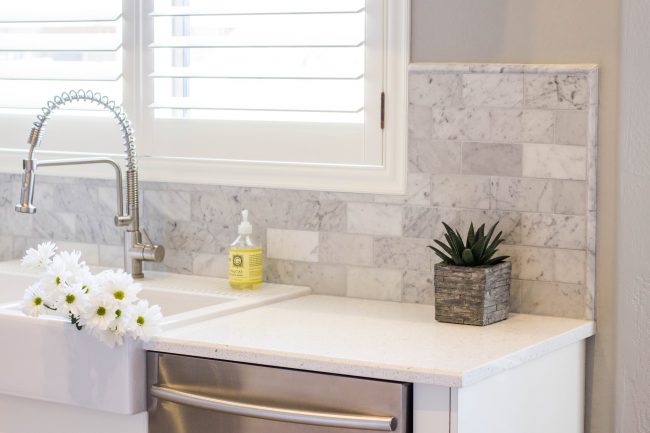
The white farmhouse style sink is from IKEA and the faucet we ordered from Amazon. I love the way the marble tile gives some pattern while still going with the theme of our white kitchen.
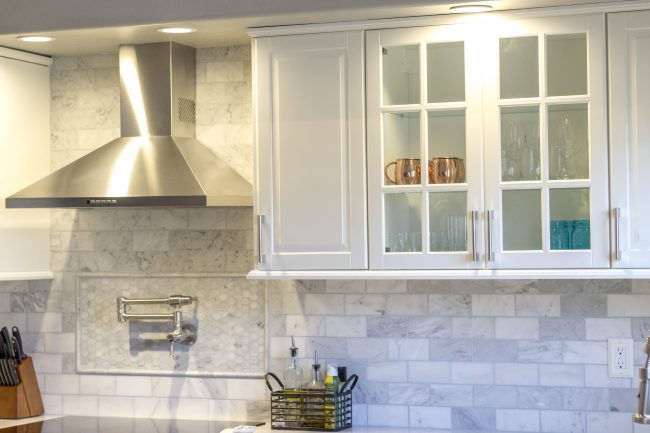
The last minute decision for a pot filler was the best decision. I love the high-end look and it’s so nice to fill pots for soup or to boil pasta.
Our old layout had the microwave above the stove, but we wanted a functioning hood and created a hole in the wall for a ventilation system.
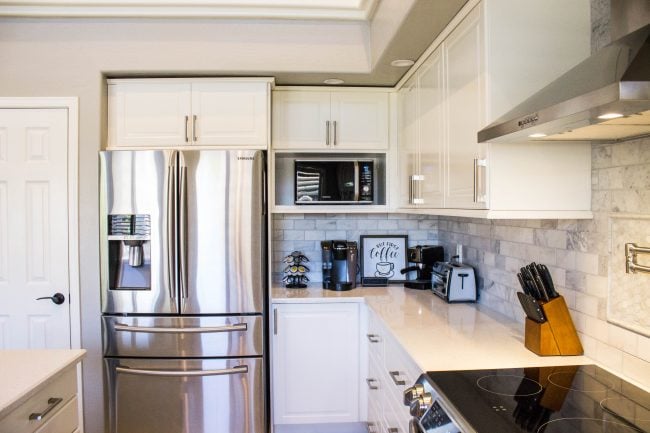
The microwave needed a new home, so we designed an open cabinet and purchased a smaller counter microwave that fits in the cabinet.
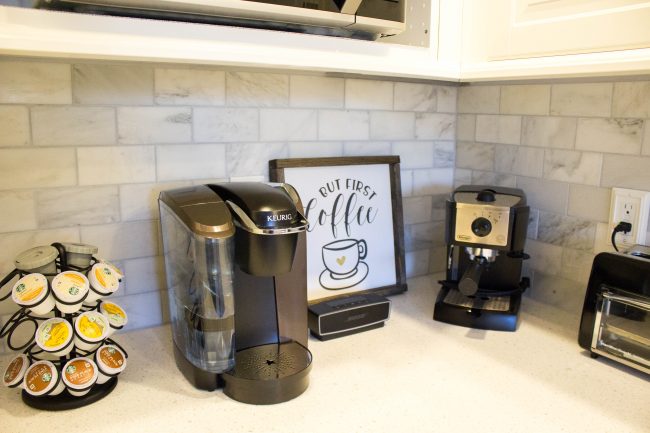
Now we can have a designated coffee area and still have plenty of counter space with the microwave being above.
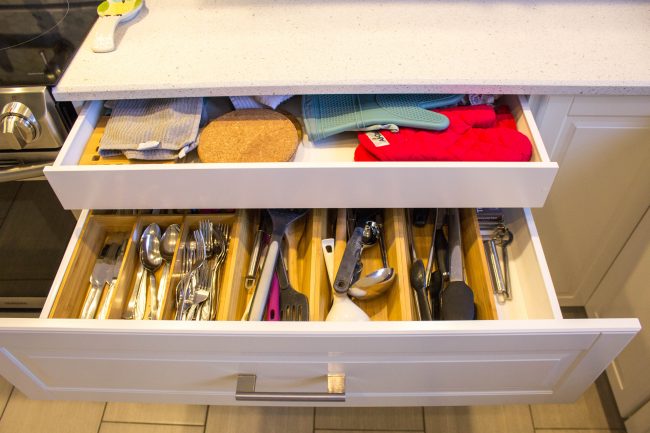
Not only did we create more space with this layout, but the IKEA drawer system is perfect for organizing and storing kitchen items where they can be easily accessible. We also added hidden drawers to the top for smaller items to be stored.

With the extended island we have more seating and the kids love that they get to sit and help me with food prepping or just watch me cook.
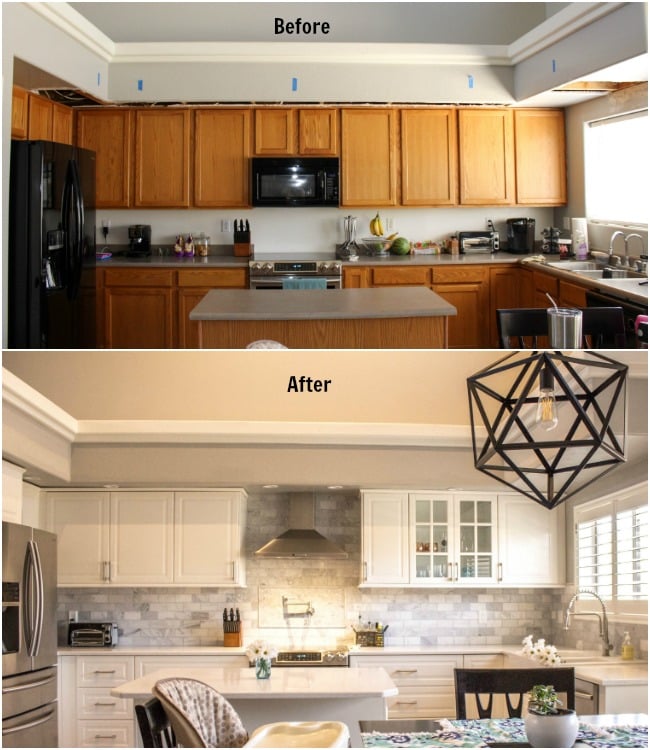
To see the before and after picture is a dream come true. It was not an easy project to complete, and thankfully with the patience and dedication of my husband we were able to do it.
Memories are made in the kitchen, and I love that I get to make special memories here!
*2022 Update* It’s been almost 5 years since we updated our kitchen, and I’m happy to report it is still holding up strong. Even with daily wear and tear, by me and my kids, the cabinets still look new, and cleaning them is a breeze!
I do want to add some molding to the island for some texture, and I’ll be sure to add pics once that project is completed.
Check out my YouTube Videos that I film in my kitchen!

Beautiful! You’ve inspired me to do my small kitchen myself.
Awesome! Best of luck 🙂
Do you have a link for the backsplash?
Hi Kristine, yes here are the links (affiliate links)
Hexagon backsplash (around the pot filler)- https://rstyle.me/+T8fW0HfuKK0x-dyrL5xLow
Subway marble tile- https://rstyle.me/+KDddMVFKYIbwgqDEUvtr4Q
Marble Trim- https://rstyle.me/+bP9M9OwSRVjnb5jwchUGHQ
Hi! You’re kitchen looks great! Which IKEA cabinets did you use?
Thank you so much! It’s the BODBYN doors.
I’d love to do exactly what you guys did with the microwave. Can you share more details on how you did it? Did you use an IKEA cabinet for it? Our kitchen will be a new build, and doing it ourselves seems daunting, but it will be much smaller. Yours is inspiring.
Thank you so much! For the microwave it was an ikea cabinet and we added a shelf. It is daunting, but having Ikea come out and draw up the plans makes it easier, then it’s just a process of building each configuration. Best of luck!
Was it a full height cabinet, and then use shorter doors? Or a short cabinet, and then built the shelf below?
Actually, I got mixed up! The microwave section is 2 small cabinets. The cabinet on top has doors and the one below, where the microwave is, does not have doors. They are both the same size and when put together equal the full length cabinet. Does that make sense?
Yes it does, thanks so much.
It’s truly crazy just how big a difference a lighter color can actually make. I’m currently refinishing my cabinets with N-Hance of Greenville and going with a slightly off white color and I’m loving it so far!! Thanks for sharing your beautiful kitchen. I wish I was more DIY savvy but it’s at least still fun to live vicariously through others.
Thanks so much!
It’s beautiful! Any chance you remember the paint colour you used for the walls?
Thank you! It’s Sherwin Williams Repose Grey.